Sunday, July 31, 2011

Key Lime Cheesecake


From the kitchen of One Perfect Bite...My family has been arriving in stages for our annual summer reunion and our older grandsons have been helping in the kitchen. They are both at an age where they love to cook and they've really started to master some of the simpler dishes that are our family favorites. Let me hasten to add, that the boys aren't terribly keen on the cheesecake I'm featuring today. They'll happily assist in making it, but when it comes to desserts, they are traditionalist and nothing will ever beat their favorite blueberry or lemon meringue pies. I am, however, determined to get them to try at least a bite of this before they leave. It is delicious and if I can't convince them to try it, perhaps I can talk you into it. While the cake is a bother to make, its taste more than makes up for the time and effort involved in getting it to the table. If you like cheesecake, this one must be tried. I've taken lots of short cuts with the recipe, but this still remains a 24 hour dessert. It truly needs a full day to set and mellow. While this is lovely when made with fresh key limes, the bottled product is perfectly acceptable and makes much better use of your time. I've also included whipped cream in the ingredients list for those who feel a key lime dessert is not complete without it. I'm not sure that a cake that uses a full pound of cream cheese really needs to be covered with two cups of whipped cream, but I let you decide. I hope at least a few of you will try this luscious dessert. Here's the recipe.

Key Lime Cheesecake
...from the kitchen of One Perfect Bite

Ingredients:
Crust
2/3 cup butter, melted
1-3/4 cups sugar, divided use
2 cups graham cracker crumbs
Filling
1 envelope unflavored gelatin
3/4 cup key lime juice
4 eggs, at room temperature
2 egg yolks, at room temperature
2 tablespoons grated key lime zest
1 pound cream cheese, at room temperature
2 egg whites, at room temperature
Pinch of salt
Optional: 2 cups sweetened whipped cream

Directions:
1) In a mixing bowl, combine melted butter, 1/4 cup sugar and graham cracker crumbs. Mix well. Press crust firmly over bottom and 2 inches up side of a greased of a 9-inch spring form pan. Set aside.
2) In a saucepan dissolve gelatin in key lime juice, about 5 minutes. Combine 1-1/4 cups of sugar, eggs, egg yolks, and lime zest in a separate bowl and mix well. Add some hot gelatin mixture and whisk to combine. Pour mixture back into saucepan. Mix well. Over medium heat, cook until mixture thickens and is pudding-like, about 7 to 8 minutes. Remove from heat.
3) In bowl of an electric mixer, fitted with a paddle attachment, beat cream cheese until smooth. With mixer running, add lime mixture slowly and beat until smooth. Remove mixture and turn into a bowl and cool completely. Cover with plastic wrap and refrigerate until chilled, stirring every 10 minutes.
4) In a bowl of an electric mixer with a whip attachment, place egg whites and remaining 1/4 cup of the sugar. Whip on medium high until stiff peaks form. Remove lime and cheese mixture from the refrigerator. Fold egg whites into lime mixture and blend thoroughly. Pour mixture into prepared crust. Cover with plastic wrap and refrigerate until set, about 4 to 24 hours.
5) When ready to serve remove from refrigerator. Run a sharp knife along the sides of pan and remove the spring-form. If using, spread whipped cream evenly over top of the cake. Cut cake into individual servings. Yield: 10 to 12 servings.


One Year Ago Today: Watermelon Limeade


Two Years Ago Today: Baked French Toast with Cardamom and Apricot Preserves


You might also enjoy these recipes:
Chocolate Strawberry Refrigerator Cheesecake - Passionate About Baking
Tiramisu Cheesecake - Amanda's Cookin'
No Bake Cheesecake Cookie Cup - This Little Corner of Mine
Nutella Cheesecake - Alterkitchen
Cheese Cake Bars- Big Fat Baker

Saturday, July 30, 2011

Baja Summer Slaw


From the kitchen of One Perfect Bite...This bright and colorful salad is a wonderful addition to a summer barbecue. It's packed with tropical flavors and its vague sweetness is a perfect foil for the smoky and spicy flavors that come off a grill. The salad is based on one that was served with seafood, particularly shrimp and lobster, when Bob and I were trekking through Baja Mexico, a very long time ago. We were without chick or child at the time and our spirit of adventure was far larger than our wallets. The Baja had not yet been discovered, so it was still possible to explore the peninsula and the Sea of Cortez on the cheap. We camped and cooked on open fires and every so often we'd dine out. My entree on those occasions was always shellfish because it was fresh and abundant and you could watch it being prepared. Were it not for its freshness, that would have been a strange choice. Pacific lobster, at least in my opinion, lacks the flavor of its Atlantic cousin. It needs something to perk it up and slaws or salads of this type really did the trick. I've fashioned a recipe of sorts for you, but as you read through the ingredients you'll see how you might be able to play with it. I love the freshness of this salad and I think you will, too. It's very easy to make and you can be as creative with the ingredients as you like. It is a lovely slaw, but I must admit I miss the dash of adventure we added all those years ago. Perhaps you can add your own. Here's the recipe.

Baja Summer Slaw...from the kitchen of One Perfect Bite

Ingredients:
1/4 cup pineapple juice from canned pineapple tidbits
2 tablespoons olive oil
1 tablespoon lime juice
1/2 teaspoon ground cumin
1/8 teaspoon sugar
1/4 teaspoon salt
1 (10-oz.) bag very finely shredded cabbage (angel hair)
1 (8-oz.) can pineapple tidbits packed in pineapple juice
1 cup diced papaya or mango
1 cup diced sweet red bell pepper
1 small jalapeno pepper, finely chopped with seeds and ribs removed
1/4 cup minced cilantro
Salt and pepper

Directions:
1) In a jar with a tight-fitting lid, combine pineapple juice, oil, lime juice, cilantro, cumin,sugar and salt in a jar with a tight fitting lid. Shake well.
2) Combine cabbage, pineapple, papaya, bell pepper, and jalapeno pepper in a large bowl. Drizzle with dressing and toss to coat. Cover and refrigerate for at least 2 hours. Add cilantro and stir just before serving. Yield: 6 servings.


One Year Ago Today: Beginner's Whole Wheat Batter Bread


Two Years Ago Today: Apple Onion Bread with Cheddar Cheese


You might also enjoy these recipes:
Oil and Vinegar Coleslaw - Brown Eyed Baker
Sweet and Spicy Coleslaw - Inspired 2 Cook
Creole Coleslaw - My Catholic Kitchen
Asian Coleslaw - Elly Says Opa
Pineapple Coleslaw - Good Thymes and Good Food

Friday, July 29, 2011

50 Women Game-Changers in Food - #8 Judith Jones - Frenchified Meat Loaf


From the kitchen of One Perfect Bite...I love tales told by those who are the power behind the throne. Those stories are especially delicious when they are told by people who have compelling stories of their own to tell. Judith Jones, the book editor who brought the likes of Julia Child, Marcella Hazan, and Madhur Jaffrey to print, is such a woman. Her work with these and other authors has changed the way we write and think about the food we eat. Her publishing career career began at Doubleday where she saved The Diary of Anne Frank from the rejection list. She later moved to Knopf where she saved Mastering the Art of French Cooking from a similar fate. Her stellar culinary roster was matched by literary clients who included John Updike, Anne Tyler and John Hersey. She has also written a number of her own cookbooks and a charming memoir, The Tenth Muse: My Life in Food. She believes that recipe writing should engage the senses and enable readers to use their own judgment. Her own recipes do just that. It's entirely fitting that she claim 8th place on the Gourmet Live list of 50 Women Game-Changers in Food.

I have chosen the simplest of recipes to represent her work. She calls it a Frenchified meat loaf. Having just made and served this for our supper, I can tell you it bears no resemblance to the meat loaf of childhood memory - unless of course you're French. This is a lovely entree whose flavors carry with them the scents and tastes of Provence. It's a dense loaf with a texture that is far more like a pate than a meat loaf. It will make wonderful cold sandwiches for tomorrow's lunch. I really think you'll like it. Here's the recipe as it was written by Judith Jones.

Frenchified Meat Loaf...from the kitchen of One Perfect Bite courtesy of Judith Jones

Ingredients:
3 slices homemade-type white bread, crusts removed
3 pounds ground beef, veal, and pork (about 1/2 beef portion and 1/2 each of veal and pork)
1 large onion, finely chopped
1 large egg
1 tablespoon Dijon mustard
2 teaspoons salt
2 fat garlic cloves, peeled, chopped, and mashed with 1/2 teaspoon salt (see below)
Several grindings of black pepper
1/4 cup chopped fresh parsley
2 to 3 tablespoons chopped fresh herbs (basil, tarragon, marjoram), or 1 teaspoon herbes de Provence
2 bay leaves
2 strips bacon
1/2 cup red wine

Instructions:
1) Spin the bread in a blender to make crumbs; you should have 1-1/2 cups. Dump everything except the bay leaves, bacon, and wine into a big bowl, and blend well, preferably with your hands.
2) Arrange the bay leaves on the bottom of a large loaf pan, and pack the meat mixture in. Place the strips of bacon on top, then pour the wine over, punching a few holes into the meat with your fingers so it will seep down a little. Let marinate for an hour or so, then bake in a preheated 325-degree oven for 1-1/2 hours. Turn out of the pan, and remove the bay leaves. And pour any pan juices on top. Serve hot. Yield: 6 servings.

Note: If veal is too expensive or hard to get, use about 3/4 beef to 1/4 pork, ground. If you prefer, slice the peeled garlic instead and press into the top of the meatloaf, then remove the slices before you turn the meatloaf out.

The following bloggers are also paying tribute to Judith Jones this week. I hope you'll visit all of them.

Val - More Than Burnt Toast
Joanne - Eats Well With Others
Taryn - Have Kitchen Will Feed
Susan - The Spice Garden
Claudia - A Seasonal Cook in Turkey
Heather - girlichef
Miranda - Mangoes and Chutney
Jeanette - Healthy Living
April - Abby Sweets
Katie - Making Michael Pollan Proud
Mary - One Perfect Bite
Kathleen -Bake Away with Me
Viola - The Life is Good Kitchen
Sue - The View from Great Island


Next week we will highlight the food and recipes of Irma Rombauer. If you'd like to join us please email me for additional information. Everyone is welcome.

Thursday, July 28, 2011

Stir Fried Snow Peas


From the kitchen of One Perfect Bite...Our farmer's markets are flooded with legumes this week. There are bins of snow, snap and English peas just waiting for the taking. I'd love to believe they are field fresh and locally grown, but I suspect they've been shipped from a neighboring state. I guess that's local enough to prevent a guilty conscience on my part, but the locovore in me wishes they were truly home grown. The snow peas looked wonderful and the few I tested were stringless, so there was no doubt about which peas were coming home with me. I love to stir fry vegetables, especially at this time of year. The rapid tossing and high heat, assure the vegetables will be crisp tender and offer perfect resistance to the tooth. I like to finish certain of the vegetables with a light coating of an Asian-style sauce. The sauce used in this recipe is really interesting and I think those of you who try it, will enjoy it. There is, however, a caveat. The sauce coats the peas in an unappetizing shade of brown. The peas you see in the picture above were wiped clean for the photograph. If you saw them fully dressed you'd run for the hills and think that I had come undone. While they'll win no beauty contests, I can assure you the peas are delicious and appear regularly on my table. If you can look past the unfortunate color, I think you'll really enjoy them. Here's the recipe.

Stir Fried Snow Peas...from the kitchen of One Perfect Bite inspired by Taste of Home Magazine

Ingredients:
1 pound fresh snow or sugar snap peas
2 teaspoons canola oil
1 garlic clove, minced
2 teaspoons minced fresh ginger
1-1/2 teaspoons balsamic vinegar
1-1/2 teaspoons reduced-sodium soy sauce
1 teaspoon sesame oil
Dash cayenne pepper
1 tablespoon minced fresh basil or 1 teaspoon dried basil
2 teaspoons sesame seeds, toasted

Directions:
In a large nonstick skillet or wok, saute the peas in canola oil until crisp-tender. Add the garlic, ginger, vinegar, soy sauce, sesame oil and cayenne; saute 1 minute longer. Add basil; toss to combine. Sprinkle with sesame seeds. Yield: 6 servings.


One Year Ago Today: Israeli Salad


Two Years Ago Today: Roasted Beet Salad


You might also enjoy these recipes:
Summer Vegetable Salad - The Spamwise Chronicles
Red Cabbage and Snow Pea Salad - My Life Runs on Food
Thai Summer Salad - Recipe Girl
Marinated Vegetable Salad - In Flora's Kitchen
Mexican Sweet Corn Salad - Expat Recipes

Wednesday, July 27, 2011

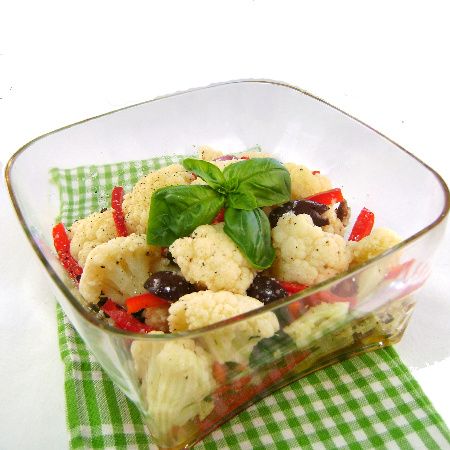
Cauliflower Salad with Red Pepper, Olives and Anchovies


From the kitchen of One Perfect Bite...I first sampled this salad in the Italian kitchen of my childhood. Mrs. S. made it for her family, but only during the Christmas holiday. The dish originated in Sicily and it was called insalata di rinforzo. She called it reinforced salad because its ingredients were refreshed every day until the feast of the Epiphany was celebrated. At that point, it would miraculously disappear from her table and not be seen again until the following Christmas. I had really fond memories of the salad which looked like an element of giardiniera, but tasted nothing like its acrid pickled cousin. I had for years tried to duplicate it, but was never able to get it quite right. While searching for recipes that could be used to represent the work of Marcella Hazan, I stumbled on her recipe for the salad and, of course, had to try it. What was lost had now been found and I wasted no time making it. I love the way this salad looks and I really like its heady earthy flavors. The salad, which is very easy to make, is strongly flavored and not meant for the faint of heart. Those who share my love of full-bodied foods are in for a taste treat. Please note that the recipe uses capers and anchovies, neither of which are favorites of the general public. I'd love to tell you they can be omitted, but that is not the case. It's best not to attempt the salad if you aren't going to use them. Hazan's recipes have a lovely balance of flavors and I think you'll really like this salad. Here's the recipe.

Cauliflower Salad with Red Pepper, Olives and Anchovies...from the kitchen of One Perfect Bite courtesy of Marcella Hazan

Ingredients:
1 head cauliflower, about 1-1/2 pounds
2 tablespoons capers, drained
4 flat anchovy fillets, coarsely chopped
1/2 cup sweet red bell pepper,peeled, cored and cut into thin strips
10 black Greek-style olives, pitted and cut in half
Salt
Freshly ground black pepper
1/3 cup extra virgin olive oil
2 tablespoons wine vinegar

Directions:
1) Trim outer leaves of cauliflower and cut an x in the root. Bring at least 6 cups of water to a boil. Add cauliflower, cover pot, and cook until stem of cauliflower can easily be pierced with a fork, about20 minutes. Drain and cool.
2) Break cauliflower clusters into bite-sized pieces and put them in a salad bowl. Add capers, anchovies, bell pepper and black olives and toss gently to combine. Add vinegar and olive oil and toss again. Season to taste with salt and pepper to taste. Serve warm or at room temperature. Yield 4 to 6 servings.


One Year Ago Today: Red Peppers Stuffed with Orzo and Feta Cheese


Two Years Ago Today: Kona Coffee Cookies


You might also enjoy these recipes:
Marinated Vegetable Salad - Drick's Rambling Cafe
Chopped Vegetable Salad with Lemon Garlic Dressing - David Lebovitz
Vegetable Salad with Cheese - Eat Pray and Blog
Orzo Vegetable Salad - Maine Food and Lifestyle
Middle Eastern Vegetable Salad- My Life in Food

Tuesday, July 26, 2011

Red Pepper Soup with Ginger and Fennel


From the kitchen of One Perfect Bite...My eyes have always been bigger than my stomach. As a child I'd serve myself more food that could possibly be eaten and when visiting the library withdrew more books than could reasonably be read. Moderation was not a trait I treasured or even tried to emulate. I thought it came with naturally with age, much like wrinkles or wisdom. Obviously, it doesn't and while I've earned wrinkles aplenty and gained a bit of wisdom in the process, I still go off on tangents. I've been able to channel food from the plate to my blog and devoted a rather large portion of what I read to assuring that plate is never empty or my blog bereft of words, but every so often something triggers a tangent that simply must run its course. I hold Marcella Hazan and Madhur Jaffrey completely responsible for my latest derailment. I needed just one recipe from each of them to reach a goal I'd set for myself, but research into their lives loosed the hounds of hell and I found myself testing far more recipes than I needed. I have a couple that I'd like to share with you this week. The first is a recipe for a soup from Madhur Jaffrey. I made it again tonight and my socks are still going up and down. I think you know me to be a truth teller, so, please believe me when I tell you this is ambrosia, pure and simple. The soup is really easy to make and if you like strongly flavored food I think you'll love it. You really must try this. The predominant flavor is that of red bell pepper, but a hint of ginger and cayenne warm it slightly and make it a perfect light summer soup. You can have this molten treasure on the table in less than an hour, and it can be made ahead of time. It would be a perfect first course for a more formal meal. Please, please, please give this one a try. You won't regret it. Here's the recipe.

Red Pepper Soup with Ginger and Fennel...from the kitchen of One Perfect Bite courtesy of Madhur Jaffrey

Ingredients:

2 pounds sweet red bell peppers
4 tablespoons olive or canola oil
1 medium onion, chopped
1 medium potato (about 4 ounces), peeled and chopped
One 1-inch piece fresh ginger, peeled and chopped
1/2 teaspoon whole fennel seeds
1/4 teaspoon ground turmeric
1 teaspoon ground cumin seeds
1/4 teaspoon cayenne pepper
5-5 1/2 cups chicken stock or vegetable stock
1 teaspoon salt
5-6 tablespoons heavy cream

Directions:

Chop the peppers coarsely after discarding all the seeds. Pour the oil into a large, wide pan and set over medium-high heat. When hot, put in the peppers, onions, potatoes, ginger, fennel seeds, turmeric, cumin, and cayenne. Stir and fry until all the vegetables just start to brown. Add 2 cups of the stock and the salt. Stir and bring to a simmer. Cover, turn heat to low, and simmer gently for 25 minutes. Ladle the soup in batches into a blender and blend until smooth. Pour the blended soup into a clean pot. Add the remaining stock, thinning the soup out as much as you like. Add the cream and mix it in. Adjust salt, as needed. Heat through before serving. Yield: 4 to 5 servings.


One Year Ago Today: Pasta with Zucchini,Parmesan and Garlic Oil


You might also enjoy these recipes:
Sweet Corn Soup with Shrimp - Kitchen Parade
Simply Delicious: Caramelized Carrot and Ginger Soup - Eaterie Food
Mango Gazpacho - Seriously Soupy
Carrot Ginger Soup - Karista's Kitchen
Chilled Watermelon/Lime Soup - Seriously Soupy

Monday, July 25, 2011

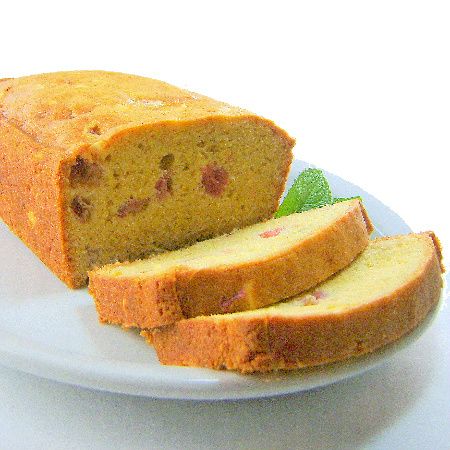
Orange Rhubarb Bread


From the kitchen of One Perfect Bite...While it's getting scraggly, rhubarb is still available at local farm stands and green markets. I really am delighted. I still have untested recipes I wanted to try and this extended growing season makes that possible. This lovely quick bread was developed by Sonya Goergen and it is quite simply delicious. It is moist and packed with a bright, tangy orange flavor that I find especially appealing. A slice of this sweet bread and a steamy cup of French press makes for a great breakfast that will kick start the gloomiest of days. The bread can be made with frozen rhubarb if a little care is exercised. The rhubarb should be measured while it is frozen, but it should be allowed to thaw and drain before it is used in the bread. Do not squeeze or press it dry. You want it to retain some moisture. This is really easy to make, and, while it stales quickly, it can be frozen. If you enjoy cranberry orange bread, I think you'll enjoy this theme and variation. Here's the recipe.

Orange Rhubarb Bread...from the kitchen of One Perfect Bite inspired by Sonya Gorgen

Ingredients:

1/3 cup butter, softened
1 cup sugar
2 eggs
2 teaspoons grated orange peel
1 teaspoon vanilla extract
2 cups all-purpose flour
1-1/2 teaspoons baking powder
1/2 teaspoon baking soda
1/2 teaspoon salt
1/4 teaspoon ground ginger
1/4 teaspoon ground nutmeg
1/2 cup orange juice
1-1/2 cups chopped fresh or frozen rhubarb
1/2 cup coarsely chopped toasted walnuts

Directions:

1) Preheat oven to 350 degrees F. Grease a 9 x 5-inch loaf pan.
2) In a large bowl, cream butter and sugar until light and fluffy. Add eggs, one at a time, beating well after each addition. Beat in orange peel and vanilla.
3) Combine flour, baking powder, baking soda, salt, ginger and nutmeg; add to creamed mixture alternately with orange juice. Fold in rhubarb and almonds.
4) Transfer batter to prepared loaf pan. Bake for 55-65 minutes or until a toothpick inserted near the center comes out clean. Cool for 10 minutes before removing from pan to a wire rack. Yield: 1 loaf (16 slices).


One Year Ago Today: Blueberry Buckle


You might also enjoy these recipes:
Rhubarb Cake with Custard Filling - The Dutch Baker's Daughter
The Lighthouse Keeper's Rhubarb Bread - One Perfect Bite
Buttermilk Rhubarb Bread - Eating Out Loud
Strawberry Rhubarb Bread - Fake Food Free
Orange Rhubarb Bread - The 2 Foodies
Rhubarb Bread - Confessions of a Cardamom Addict
Walnut Rhubarb Bread - La Casa de Sweets
Rhubarb Scones + Rhubarb Bread - Betsy's Bites

Sunday, July 24, 2011

Milk Chocolate Bundt Cake


From the kitchen of OnePerfect Bite...This cake, now known as the Classic Hershey Bar Cake, has been around for a long time and a lot of people have experimented with it. It was developed in the Hershey test kitchens back in the day when chocolate syrup came in a can and had to be opened with a church key. Since then, eager cooks have tried to make it their own by making small changes to the original recipe. I've tried many of them because I like to mix things up a bit and this is the type of cake that travels well, making it perfect for picnics or church suppers. While I won't be talking numbers, I've been to a lot of picnics and church suppers in my day, so I've a good working relationship with this cake and I've made it a lot. It is a sweet cake, actually sweeter than I like, but it is always well-received and disappears before it has a chance to stale. I've come full circle on recipes for making it. I began with the one that came from the Hershey kitchen and that's the one I've finally settled on. This is very easy to make and there is little that can go wrong, save for over-baking it. Milk chocolate cakes have a slightly anemic appearance, so, I like to sprinkle this one confectioners' sugar before serving. It is also lovely when served with a dollop of whipped cream and a drizzle of chocolate syrup. I think those of you who try the cake will enjoy it. Here's the recipe.

Milk Chocolate Bundt Cake...from the kitchen of One Perfect Bite courtesy of Hershey Test Kitchens

Ingredients:
1 cup (2 sticks) butter or margarine, softened
1-1/4 cups granulated sugar
4 large eggs
6 (1.55 oz. each) Hershey's Milk Chocolate Bars, melted
2-1/2 cups all-purpose flour
1/4 teaspoon baking soda
Dash salt
1 cup buttermilk or sour milk*
1/2 cup Hershey's Syrup
2 teaspoons vanilla extract
1 cup chopped pecans
Optional:
Confectioners' sugar
Additional chocolate syrup

Directions:

1) Heat oven to 350 degrees F. Grease and flour 10-inch tube pan or 12-cup fluted tube pan.
2) Beat butter in large bowl until creamy; gradually add granulated sugar, beating on medium speed of mixer until well blended. Add eggs, one at a time, beating well after each addition. Add chocolate; beat until blended.
3) Stir together flour, baking soda and salt; add to chocolate mixture alternately with buttermilk, beating until blended. Add syrup and vanilla; beat until blended. Stir in pecans. Pour batter into prepared pan.
4) Bake 1 hour and 15 minutes or until wooden pick inserted in center of cake comes out clean. Cool 10 minutes; remove from pan to wire rack. Cool completely. Sift powdered sugar over top and drizzle with chocolate syrup, if desired. 12 to 16 servings.

*Cook's Notes: To sour milk: Use 1 tablespoon white vinegar plus milk to equal 1 cup.


One Year Ago Today: Watermelon Smoothies


Two Years Ago Today: Orange Phoenix Chicken with Grilled Bok Choy


You might also enjoy these recipes:
Orange Chocolate Bundt Cake - Buttercream Barbie
White Chocolate Bundt Cake - My Kitchen Adventures
Hot Fudge Chocolate Bundt Cake - Sugar Plum
Beautiful Bundt - Stacey Snacks
Cinnamon Chocolate Bundt Cake - Passionate About Baking

Saturday, July 23, 2011

Thai-Style Green Beans


From the kitchen of One Perfect Bite...While our berries are a bust this year, I'm happy to report that most locally grown vegetables seem to have escaped the problems that have come with our strange summer weather. To wit, while they'll be late, there will be corn and tomato crops and bean bins in our green markets are already brimming with a harvest of green and gold. When such large quantities of vegetables are dumped in markets at one time, there are bargains to be found. I've blanched and frozen a bushel of beans that were purchased for pennies on the dollar and I've started searching for recipes that will allow me to serve fresh beans in new ways. I'm really happy that I found this one. It's a prize winner that was developed by Candy McMenamin, a cooking contest colleague, who has an impressive number of wins to her credit. Her beans are fast, easy and delicious and the recipe, written to serve two people, can easily be doubled. While they don't make a particularly pretty dish, the peanut sauce they are tossed with makes the beans wonderfully flavorful and I really think you'll enjoy them. Here's the recipe.

Thai-Style Green Beans...from the kitchen of One Perfect Bite courtesy of Candy McMenamin

Ingredients:
1 tablespoon reduced-sodium soy sauce
1 tablespoon hoisin sauce
1 tablespoon creamy peanut butter
1/8 teaspoon crushed red pepper flakes
1 tablespoon chopped shallot
1 teaspoon minced fresh gingerroot
1 tablespoon canola oil
1/2 pound fresh green beans, trimmed
Optional: Minced fresh cilantro and chopped dry roasted peanuts

Directions:
1) Combine soy sauce, hoisin sauce, peanut butter and red pepper flakes in a small bowl. Set aside.
2) In a small skillet, saute shallots and ginger in oil over medium heat until crisp tender, about 2 minutes. Add green beans and cook, stirring, until crisp tender, about 3 minutes. Add reserved sauce and toss to coat. Sprinkle with cilantro and peanuts if desired. Yield: 2 servings.


One Year Ago Today: London Broil with Garlic and Parsley


Two Years Ago Today: Tomato Brunch Sandwiches


You might also enjoy these recipes:
Spicy Green Beans - Sea Salt with Food
Cold Herb-Flavored Marinated Green Beans - One Perfect Bite
Green Beans with Garlic and Parmesan Cheese - Sweet Basil Kitchen
Green Bean, Potato and Dill Salad - A Couple Cooks
Skillet Green Beans - Christine's Pantry

Friday, July 22, 2011

50 Women Game-Changers in Food - #7 Madhur Jaffrey - Prawn Curry


From the kitchen of One Perfect Bite...The weeks are rolling by, and the group of bloggers who are working their way through the Gourmet Live list of 50 Women Game-Changers in food, are focusing on the recipes of Madhur Jaffrey for the week. If Julia Child and Marcella Hazan are credited with bringing French and Italian food to the American table, Madhur Jaffrey must also be recognized for introducing the American and British public to the best of the food from her beloved India. She is a noted chef and expert in Indian cuisine, but, interestingly, she had not planned on a career as a food writer or teacher. When she was 19 years old, she left her home in India to study at England's Royal Academy of Dramatic Art. She didn't like the food the college provided for its students and there were few Indian restaurants in London where she could satisfy her craving for good Indian food. She began to cook because she wanted to recreate the food of her childhood. With the help of her mother, who sent letters containing advice and recipes, she began to cook the simpler of the dishes she remembered. She became an actress of note, but when Craig Claiborne ran a story about her in the New York Times, she also became known for her cooking and writing skills. She considered her cooking career to be accidental, but she took it as seriously as she did her work in the theater. She has, to date, written 15 cookbooks and one memoir. That's mighty serious.

I've chosen a light but spicy shrimp dish to represent her cooking. The preparation comes from Southern India, and, while it's delicious, it is spiced with a quantity of cayenne pepper that may be too much for some palates. While purists will be unhappy, I suggest that those of you who have a low heat tolerance cut way back on the amount of cayenne used to make this dish. I've found that 1/4 teaspoon is perfect for those not familiar with the fire of some Indian dishes. I also recommend that you toast the coriander and cumin seeds that are used in the recipe. While it certainly is not necessary, straining the sauce before adding the shrimp makes for a more attractive presentation. This is a lovely curry. I hope that you will give it a try. Here's the recipe as it was written by Madhur Jaffrey.

Prawn Curry
...from the kitchen of One Perfect Bite courtesy of Madhur Jaffrey

Ingredients:
1 teaspoon cayenne pepper
1 tablespoon red paprika
1/2 teaspoon ground turmeric
4 garlic cloves peeled and crushed
1 inch piece fresh ginger, peeled and finely grated
2 tablespoons coriander seeds
1 teaspoon cumin seeds
1 (14-1/2 ounces) can coconut milk, well stirred
3/4 teaspoon salt or salt to taste
1 tablespoon tamarind paste
1 pound peeled and deveined medium-sized uncooked prawns (shrimp)

Directions:
1) In a large saucepan, combine 1-1/4 cups water with the cayenne pepper, paprika, turmeric, garlic and ginger. Mix well. Grind the coriander seeds and cumin seeds in a clean coffee grinder and add to mixture.
2) Bring the spice mixture to a simmer over medium-high heat. Turn the heat to medium-low and simmer for 10 minutes, stirring occasionally, until the sauce thickens and is reduced somewhat.
3) Add the coconut milk, salt, and tamarind paste, and bring to a simmer.
4) Add the prawns (shrimp) and simmer, stirring occasionally, until they turn opaque and are just cooked through. Adjust seasonings with salt and pepper as required to taste. Serve while hot. Yield: 4 servings.

The following bloggers are also paying tribute to Madhur Jaffrey this week. I hope you'll visit all of them.

Val - More Than Burnt Toast
Joanne - Eats Well With Others
Taryn - Have Kitchen Will Feed
Susan - The Spice Garden
Claudia - A Seasonal Cook in Turkey
Heather - girlichef
Miranda - Mangoes and Chutney
Jeanette - Healthy Living
April - Abby Sweets
Katie - Making Michael Poland Proud
Mary - One Perfect Bite
Kathleen -Bake Away with Me
Viola - The Life is Good Kitchen
Sue - The View from Great Island

Next week we will highlight the food and recipes of Judith Jones. If you'd like to join us please email me for additional information. Everyone is welcome.

Thursday, July 21, 2011

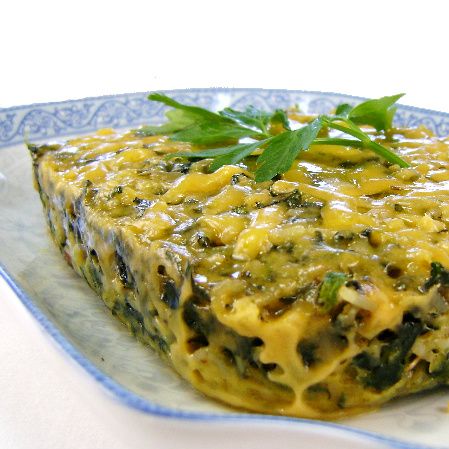
Savory Spinach and Rice Cakes


From the kitchen of One Perfect Bite...Over the years I've collected several recipes for rice cakes. I've even created a few of my own. I generally serve them as a side dish when plain grilled chicken or meat is on the menu, though I've been known to make them as entree for myself when I'm alone for dinner. They are easy to prepare, and these simple frittata-like squares are a great way to use leftover rice that might otherwise be trashed and wasted. I especially like this recipe because it's a good way to get spinach into folks, large or small, whose lips lock when they see spinach on the table. This recipe is unique because the rice cakes actually cook in a microwave oven. It takes about 20 minutes to assemble these and you can have them on the table in 30 minutes. The recipe can be doubled, and if, for any reason, you are uneasy about cooking in a microwave, the squares can be baked in a conventional oven. One caution! Cook these just until they are firm. They dry out quickly when overcooked and you'll be unhappy with them if that happens. The rice squares are not gourmet fare but they help make a lovely family meal special. Here's the recipe.

Savory Spinach and Rice Cakes...from the kitchen of One Perfect Bite

Ingredients:
1 tablespoon butter
1/3 cup finely chopped onion
2 large eggs
1/3 cup milk
1/2 teaspoon Worcestershire sauce
1/2 teaspoon salt
1/4 teaspoon dried rosemary, crushed
1 package (10 ounces) frozen chopped spinach, thawed and squeezed dry
1 cup cooked long grain rice
1/2 cup grated Parmesan cheese
1/4 cup Cheddar cheese

Directions:
1) Spray an 8 x 4-inch microwave dish with cooking spray.
2) Melt butter in a small skillet set over medium heat. Add onions and saute until soft, about3 to 5 minutes.
3) Place eggs, milk, Worcestershire sauce, salt and rosemary in a large bowl. Whisk to combine.
Stir in spinach, rice, sauteed onions and Parmesan cheese. Transfer to prepared microwave dish.
4) Microwave, uncovered, on high for 6-8 minutes. Sprinkle with Cheddar cheese; microwave 1-2 minutes longer or until firm and a thermometer reads 160 degrees F. Cover and let stand for 5 minutes before cutting. Yield: 4 servings.


One Year Ago Today: Raspberry Kuchen


Two Years Ago Today: Lemon-Herb Slow-Cooked Chicken


You might also enjoy these recipes:
Angela's Strawberry Spinach Salad - My Kitchen Addictions
Spinach Dip - A Bitchin' Kitchen
Spinach Cheese Pinwheels - Sydney's Kitchen
Spinach Pesto - Zesty Palette
Spinach Sauteed with Roasted Garlic - Cooking with Michele

Wednesday, July 20, 2011

Frozen Pudding Cream Cake with Candy Bar Crunch Topping


From the kitchen of One Perfect Bite...This is an easy dessert that demands more time than talent from its cook. It is also one of those desserts that people either love or hate. As far as I've been able to determine, the recipe first appeared in Taste of Home Magazine where it was called Pistachio Cream Dessert. How simple is it? Instant pudding is mixed with softened ice cream and then poured into a crumb crust and refrozen. Once it's set, the cake is covered with whipped topping and sprinkled with crushed candy bars. Now, I must tell those of you who are inwardly groaning that it's not that bad a dessert. It may never be your favorite, but lots of people love it and, should you decide to make it, your reputation won't be tarnished. It's important to know that in addition to pistachio, coconut, banana or butterscotch pudding can also be used to make the dessert. Pistachio is my least favorite of the flavors, but its lovely green color is visually stunning and makes for a great presentation. I personally love to make this using banana pudding. You can also vary the type of crumbs used to make the cake base and any candy bar that has a bit of texture can be used for topping. I don't much care for whipped topping, but I found that when it's folded into an equal measure of lightly beaten cream my arguments against it tend to fade. This is a rich dessert that keeps well. I think those of you who try it will think it worth the time it took to make. Here's the original recipe.

Frozen Pudding Cream Cake with Candy Bar Crunch Topping...from the kitchen of One Perfect Bite adapted from Taste of Home Magazine

Ingredients:
1 cup crushed butter-flavored crackers
1/4 cup butter, melted
3/4 cup cold 2% milk
1 package (3.4 ounces) instant pistachio pudding mix
1 quart vanilla ice cream, softened
1 carton (8 ounces) frozen whipped topping, thawed
2 packages (1.4 ounces each) Heath candy bars, crushed

Directions:
1) Preheat oven to 325 degrees F.
2) Combine cracker crumbs and butter in a small bowl. Press into an ungreased 9-in. square baking pan. Bake for 7-10 minutes or until lightly browned. Cool on a wire rack.
3) Meanwhile, in a large bowl, whisk milk and pudding mix for 2 minutes. Let stand for 2 minutes or until soft-set. Stir in ice cream; pour over crust. Cover and freeze for 2 hours or until firm.
4) Spread with whipped topping; sprinkle with crushed candy bars. Cover and freeze for 1 hour or until firm. Yield: 9 servings.


One Year Ago Today: Flaked Parsley Salad with Olives and Parmesan Cheese


Two Years Ago Today: Navajo Blue Corn Fried Chicken with Ancho Honey Sauce


You might also enjoy these recipes:
Pistachio Gelato - Sydney's Kitchen
Apricot and Pistachio Galette - Cook Sister!
Bacon Pistachio Cookies - Jane Deere
Pistachio and Dark Chocolate Butter Cookies - Baking Bites
Pistachio Cherry Chip Cookies - Kitchen Gypsies

Tuesday, July 19, 2011

Orange and Rhubarb Oatmeal Porridge


From the kitchen of One Perfect Bite...We've had rain for two days now. I'm talking periodic deluge, not the rare and gentle sprinkle that's usually associated with summers here in Oregon. Mornings are cold and it just seems weird to be running around in a lumberjack's hoodie trying to keep warm. It's July for Pete's sake. Now, I don't want to start a rumor, but I have a really uneasy feeling that summer has been stolen. Just the thought sends shivers up and down my spine. Our grandchildren will soon be here, and the thought of all of us housebound on this hillside is enough to make grown men weep. The Silver Fox has refused permission to publish the grown man weeping photo I planned to insert here, but to stay in my good graces he agreed to sample an oatmeal dish that I've been wanting to try. I've just been given the thumbs-up, so I can share it with you. The recipe was developed for Eating Well magazine. I've made some changes to their version because I thought the orange juice used in the recipe overpowered the other ingredients. In order to retain an orange flavor, I replaced the juice with a bit of zest and I think it worked well. This is a very nice way to start a damp and chilly day. The original recipe, Oatmeal-Rhubarb Porridge, can be found here. My version follows. I hope you will try it. The recipe can, of course, be doubled.

Orange and Rhubarb Oatmeal...from the kitchen of One Perfect Bite inspired by Eating Well Magazine

Ingredients:
2 cups nonfat milk
1/2 teaspoon orange zest
1 cup old-fashioned rolled oats
1 cup rhubarb, cut in 1/2-inch pieces
1/2 teaspoon ground cinnamon
Pinch of salt
2-3 tablespoons brown sugar, pure maple syrup or agave syrup
2 tablespoons chopped pecans or other nuts, toasted

Directions:
Combine milk, zest, oats, rhubarb, cinnamon and salt in a medium saucepan. Bring to a boil over medium-high heat. Reduce heat, cover and cook at a very gentle bubble, stirring frequently, until oats and rhubarb are tender, about 5 minutes. Remove from heat and let stand, covered, for 5 minutes. Stir in sweetener to taste. Top with nuts. Yield: 2 servings.


One Year Ago Today: Bow Ties with Sausage and Leek Sauce


Two Years Ago Today: Blue Moon Ice Cream


You might also enjoy these recipes:
Overnight Cold Oatmeal - The Joyful Kitchen
Vanilla Oatmeal - Ruminations on Food
Jamaican Oats Porridge - The Food Blog
Oatmeal Porridge - The Joy of Baking
Raw Mixed Berry Oatmeal Porridge - Not Quite Nigella

Monday, July 18, 2011

Butter Pecan Ice Cream


From the kitchen of One Perfect Bite...Such a lovely word. Amarcord. I remember....two little girls, sans shoes, sitting cross legged on a porch watching cream and sugar miraculously transform from a liquid to solid state. It was our first test of the new machine their grandfather had bought for them. They had just packed it with rock salt and were waiting to see if it really could turn the ingredients they had mixed into soft ice cream. Convinced their presence was necessary to the success of the operation, they claimed their seats and planned to see the process through to its conclusion, sure in the knowledge that if watched pots never boil, they surely then must freeze. Fortunately, that first batch was perfect and, thereafter, every time their grandpa Andy would visit, they'd make ice cream together. It was usually plain vanilla, but every so often it was gussied up to please the gourmet tastes that ran rampant in the family at that time. Things like strawberries or cherries were added with wild abandon and, on special occasions, pecans and brown sugar, Andy's favorites, were thrown into the pot. I often wonder how he would react to the amazing cream combinations that are available today. He was a purist and treasured the old ways, so I suspect he'd mumble about letting things be and insist on making his favorite butter pecan ice cream the way he always had. Today's recipe is very similar to the one used all those years ago. Some of you are old enough to remember the large amount of cream used in the vintage recipes. Nowadays, the use of that much cream would be considered attempted murder, so, I've cut way back on the amount of it used in the mix. The other ingredients have pretty much remained constant. This is a lovely ice cream, and, if one of your favorite flavors is butter pecan, I hope you'll give it a try. Here's the recipe.

Butter Pecan Ice Cream...from the kitchen of One Perfect Bite inspired by Farm Journal

Instructions:
1/2 cup chopped pecans
1 tablespoon butter
1-1/2 cups half-and-half cream
1 cup packed brown sugar
2 eggs, lightly beaten
1/2 cup heavy whipping cream
1 teaspoon vanilla extract

Directions:

1) Melt butter in a small skillet set over medium heat. Add pecans and toast until lightly brown, about 6 to 8 minutes. Cool.
2) Heat half-and-half in a large heavy saucepan set over medium heat until it reaches a temperature of 175 degrees F. Add brown sugar and stir until dissolved.
3) Whisk a small amount of hot cream mixture into eggs. Add egg mixture to pan, stirring constantly. Cook and stir over low heat until mixture reaches at least 160 degrees F and coats a metal spoon. Remove from heat. Cool quickly by placing pan in a bowl of ice water; stir for 2 minutes. Stir in whipping cream and vanilla. Press plastic wrap onto the surface of custard. Refrigerate for several hours or overnight. Stir in toasted pecans.
4) Fill cylinder of ice cream freezer two-thirds full. Freeze according to the manufacturer's directions. Refrigerate remaining mixture until ready to freeze. Allow to ripen in ice cream freezer or firm up in the refrigerator freezer for 2-4 hours before serving. Yield: 1 quart.


One Year Ago Today: Coconut Bubble Tea


Two Years Ago Today: Pink Lemonade


You might also enjoy these recipes:
Date, Rum and Pecan Ice Cream - A Spoonful of Thyme
Peach Ice Cream - Annie's Eats
Malted Milk Ice Cream- Brown Eyed Baker
Fresh Mango Ice Cream - Cookie Madness
Caramel Ice Cream - Sydney's Kitchen

Sunday, July 17, 2011

Cuban-Style Pork Roast


From the kitchen of One Perfect Bite...Pork, in one form or another, frequently appears on my dinner table. Like chicken, it has the ability to be broken down into right-sized portions for two or four or more, and that makes it a positive gift for smaller family meals. You've long known of my habit of buying large single pork loins, that I then cut into meal-size portions for family or company dinners. Those loins can still be purchased for about $2 a pound and that makes it possible to prepare an entree for four or more that is really inexpensive. As a matter of fact, I do it all the time. My family will be visiting in August, so I've been experimenting with new ways to prepare these pork loins. I've decided that at least one of our meals should have a Hispanic flair and to that end I've been trying to recreate a meal we had in the Cuban section of Miami a very long time ago. Last night I finally got it right. The roast that I remember had been seasoned with a sour orange marinade that gave the glazed pork a really bright flavor that was assertive without being overwhelming. The authentic version of this dish is made with sour orange juice and that can be difficult to find. You can make a fair imitation of it by combining 2 parts of orange juice with 1 part lemon and 1 part lime juice. That's a bit too assertive for my tastes, so I use 3 parts orange juice to one of lemon. It is best to make the marinade and season the pork at least several hours before roasting. Overnight would be even better. I always tie the loins I plan to roast into a cylinder of approximately even circumference. That helps to assure even cooking of the meat. I cook my pork until its internal temperature measures 140 degrees F on a meat thermometer. At this stage, the meat will be a very pale pink and quite juicy. It is imperative that you allow the roast to rest in a foil tent for 10 to 20 minutes once you remove it from the oven. In keeping with the Cuban theme, I served the pork with a potato and carrot mash and a plain salad of iceberg lettuce and blood red tomatoes. When the children are here, I'll also add Cuban bread and a flan to the evenings menu. I hope you will try this. Those of you who do are in for a treat. Here's the recipe.

Cuban-Style Pork Roast...from the kitchen of One Perfect Bite

Ingredients:
Orange Marinade/Glaze
1 cup sour orange juice
1/2 cup brown sugar
1 tablespoon ginger
1/4 teaspoon cloves
Pork Loin
1 center cut boneless pork loin (2-1/2 to 3 pounds)
1 tablespoon + 1 teaspoon olive oil, divided use
4 teaspoons coarse garlic salt
2 teaspoons coarsely cracked black pepper
2 teaspoons dried oregano

Directions:
1) Combine orange juice, sugar, ginger and cloves in a small saucepan. Simmer for 30 minutes.
2) Using kitchen twine, tie pork loin at 1-inch intervals to form a cylinder of uniform circumference.
3) Combine garlic salt, pepper and oregano in a small bowl; toss to combine. Spread mixture on a work surface. Rub surface of meat with 1 teaspoon olive oil; roll in spice mixture. Wrap meat with clear plastic wrap and refrigerate for several hours or overnight.
4) Preheat conventional oven to 325 degrees F. or preheat convection oven to 300 degrees F.
5) Heat remaining 1 tablespoon olive oil in a large, heavy ovenproof skillet over high heat until oil begins to shimmer. Add pork; sear well, about 5 minutes per side, using tongs to roll meat until all surfaces are brown. Brush pork with glaze. Transfer skillet to oven and roast for 15 minutes. Brush again with glaze and roast for 20 minutes longer, or until pork reaches an internal temperature of 140 degrees F. Remove from oven. Brush again with glaze. Tent with foil; let sit for 10 minutes before slicing. Yield: 6 servings.


One Year Ago Today: Shrimp and Cheesy Grits


Two Years Ago Today: Shrimp and Cheesy Grits


You might also enjoy these recipe:
Pork Roasted in White Wine- Simple Daily Recipes
Bacon Wrapped Pork Roast with Sage - She Simmers
Spicy Peanut Butter Pork Roast - Peanut Butter Boy
German-Style Pork Roast - Cooking for My Captain
Smothered Pork Roast with Rice - Deep South Dish

Saturday, July 16, 2011

Glazed Peanut Butter and Oatmeal Bars


From the kitchen of One Perfect Bite...This is not tea party fare, but if you picnic or provide snacks for a youth group or school sports team, you might want to add this recipe to your files. These cookies are really easy to make and what they lack in refinement they make up for in taste. The recipe is so straight forward, that I have little to add to the instructions that appear below. I've found the flavor improves if the cookies are made the day before you plan to serve them. They also freeze well if long term storage is your goal. I do have one small caution to share with you. While freezing does not harm their flavor, it will cause the gorgeous glaze to lose its sheen and become cloudy. I hope those of you who have children will give these a try. You won't be disappointed. Here's the recipe.

Glazed Peanut Butter and Oatmeal Bars...from the kitchen of One Perfect Bite courtesy of Taste of Home Magazine

Ingredients:
Cookie Base
3/4 cup butter, softened
3/4 cup creamy peanut butter
3/4 cup sugar
3/4 cup packed brown sugar
2 eggs
2 teaspoons water
1-1/2 teaspoons vanilla extract
1-1/2 cups all-purpose flour
1-1/2 cups quick-cooking oats
3/4 teaspoon baking soda
1/2 teaspoon salt
Glaze
1-1/4 cups milk chocolate chips
1/2 cup butterscotch chips
1/2 cup creamy peanut butter

Directions:
1) Grease a 15 x 10 x 1-inch baking pan. Preheat oven to 325 degrees F.
2) Cream butter, peanut butter and white and brown sugars in a large bowl until light and fluffy.
Beat in eggs, water and vanilla.
3) Combine flour, oats, baking soda and salt in another bowl. Gradually add to creamed mixture.
4) Spread in prepared baking pan. Bake until lightly browned, about 18-22 minutes.
5) Meanwhile, combine peanut butter, chocolate and butterscotch chips in a microwave bowl. Melt, on HIGH power, stirring until smooth. Pour over warm bars, spreading evenly. Cool completely on a wire rack before cutting. Yield: 48 bars.


One Year Ago Today: Cowboy Caviar


Two Years Ago Today: Grilled Pork Burgers Indochine


You might also enjoy these recipes:
Chocolate Chunk Oatmeal Cookies - Girl Gone Gourmet
Chocolate Revel Bars - Baking Bites
Butterscotch Oatmeal Cookies - Sugar Pies
Peanut Butter Oatmeal Cookies - Peanut Butter Boy
Peanut Butter and Oatmeal Cookies - Eat Good 4 Life
Related Posts with Thumbnails

Printfriendly